
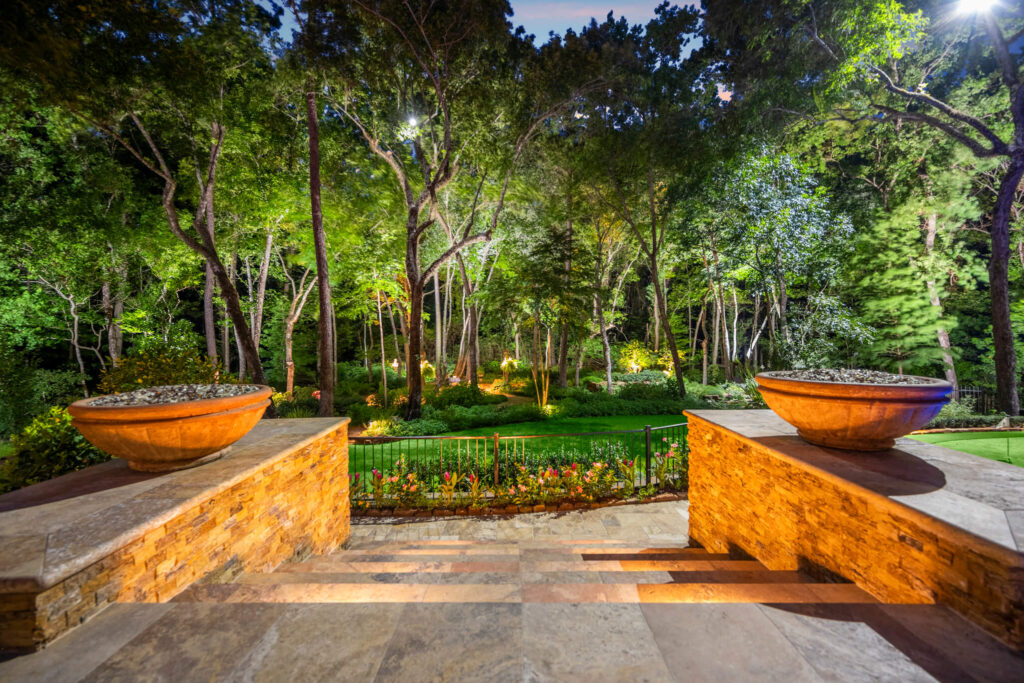
Turn Your Cypress Backyard Into a Resort at Night
Great outdoor lighting can make your Cypress backyard feel like a private resort after dark. Instead of a dark yard where everyone heads inside after sunset, you get a relaxed, beautiful space that still feels safe and welcoming.
A high-end landscape lighting design is not about throwing bright lights everywhere. It is about layering gentle light, creating depth, and highlighting the best parts of your home and yard. The secret to getting that luxury look is planning it at night with a guided walkthrough, not guessing in the middle of the day.
During a night demo, you walk your property with a lighting pro, try different fixtures and angles in real time, and see how each option actually looks. Nothing is permanent yet, so you can move lights around, test dimming, and build control scenes that fit how your family uses the space.
We are a family and veteran-owned company serving the Houston area, and we plan these walkouts around how people really live outdoors here: long summer evenings, backyard hangouts, and kids splashing in the pool long after sunset.
Why a Nighttime Walkthrough Beats Daytime Planning
If you want high-end landscape lighting, the design choices need to be made in the dark. The same fixture that looks soft and subtle at night can seem pointless in full sun, and spots that look safe in daylight can vanish after sunset.
At night, you can actually see:
- True light levels on paths, steps, and pool edges
- How shadows fall on trees, brick, and stone
- Where your eyes naturally go when certain features are lit
- Any harsh glares or bright hot spots on the house
Here in Cypress, summer evenings stretch out, which is great for testing. A smart plan is to start the walkthrough around dusk, then keep going as it shifts to full dark. That way you see how the yard feels when the sky still has a little glow and when it is completely black.
Many homeowners find that a night demo helps them avoid:
- Over-lighting patios so they feel harsh instead of relaxing
- Bright circles of light on siding or stucco that show every little mark
- Missed safety issues near steps, raised planters, or the pool edge
- Awkward dark holes between bright spots that make the yard feel choppy
Making these changes in demo mode is quick. Moving a temporary fixture or swapping a beam spread before install is far easier than redoing a finished system later.
Mapping Your Property Into Lighting Zones That Make Sense
A big part of high-end lighting is breaking your property into smart zones, not one giant on or off switch. A zone is simply a group of lights that belong together and usually run on the same dimming or schedule.
Common zones that work well for Cypress homes include:
- Front curb appeal
- Front entry and driveway
- Entertaining patio or outdoor kitchen
- Pool and spa area
- Side yards and gates
- Back fence line or tree line
Each of these areas has its own job. The front yard should welcome guests and show off your home, the patio should feel cozy and social, and the pool area should feel fun and safe. When each area is its own zone, you can dim or shut it off without affecting the rest of the yard.
During a walkthrough, a simple route works best. Start at the street to see curb appeal, then move along the driveway and entry path. From there, head to the main patio or outdoor living area, check the pool and spa, then finish with side yards and the far back edges.
At each zone, ask simple questions:
- Is this bright enough to feel safe walking?
- Does this feel calm and relaxing or too intense?
- What do I want guests to notice first from here?
- If only one thing glowed in this area, what should it be?
Those answers guide where fixtures go, what to highlight, and how each zone should be controlled.
Aiming, Beam Control, and Glare Checks Like a Pro
During a high-end lighting demo, you will likely see several types of fixtures, each with its own job.
Common options include:
- Uplights for trees, columns, and the front of the house
- Downlights mounted higher to softly wash patios or lawns
- Path lights along walkways and garden edges
- Small step or niche lights tucked into walls or risers
The magic comes from aiming and beam control. For example, tree uplights might be tilted to catch the trunk and branches without shining into second-story windows. On columns, a tighter beam can highlight the shape, while on siding a wider, softer wash keeps the light more natural.
During the walkthrough, it helps to:
- Stand or sit where people actually gather, such as the patio seating area
- Walk along paths at normal speed, not slow and careful
- Look from the street and from the back door into the yard
Anywhere you see the fixture itself glaring into your eyes, the light needs to be adjusted, shielded, or moved. This is especially true near pools and driveways, where reflections can be distracting.
Color temperature and brightness also matter. Warm white light often looks best on Cypress area brick and stone and feels inviting for backyard gatherings. Brighter levels can be saved for cooking, cleanup, or when kids are running around, while late-night lounging feels better with dimmer, softer light.
Designing Smart Control Scenes for Real Life in Cypress
Once zones are set and fixtures are aimed, it is time to think about how you will actually use the lights. That is where control scenes come in. A scene is simply a preset combination of zones and dim levels that you can turn on with one tap.
Common scenes for Houston area homes might be:
- Everyday Evening, gentle light in the front, paths, and patio
- Entertaining, more light on the patio and outdoor kitchen
- Game Night on the Patio, bright table and grill, softer pool
- Late Night Pool, focus on the water and safety, less on the house
- Security, stronger light at entries, gates, and dark corners
During the walkthrough, you can test these live. For example, you might dim the pool lights so the water glows softly, while keeping the outdoor kitchen brighter so it is easy to prep food. Or you might keep the side yards darker for a calmer feel, but boost light near gates.
Smart control options can include app control, timers that follow sunset times, and motion or event-based triggers. Many homeowners like having one scene for typical weeknights, another for weekends, and one just for late arrivals.
Seasonal routines also play a role. When school is in session, you may want brighter scenes earlier in the evening for homework on the patio. In high summer, you might shift start times later and build special scenes you can reuse for holidays and backyard parties.
Planning Your Own High-End Landscape Lighting Walkthrough
To get ready for a professional night demo, a simple first step is to walk your yard after dark with a notepad. Notice where you feel uneasy walking, which spots seem wasted in the dark, and which features you wish stood out more. Think about where people actually sit, walk, and play on a normal night.
When you meet with a lighting pro from Texas Natural Concepts, the process typically starts at dusk. We set up temporary demo fixtures, walk zone by zone with you, tweak aiming and brightness in real time, and test scene ideas based on how your family uses the yard. By the end, you have a clear picture of how your home can look and feel every night, before a single permanent fixture goes in.
Transform Your Outdoor Space With Custom Lighting Design
If you are ready to elevate your property with artfully designed illumination, our team at Texas Natural Concepts is here to help. Explore how our high-end landscape lighting can highlight your architecture, enhance safety, and create a welcoming atmosphere after dark. We will work closely with you to design a tailored lighting plan that fits your home and lifestyle. To discuss your project or request a consultation, simply contact us.